
How to Calibrate a Dexcom G7: Step-by-Step Guide
Learn how to calibrate a Dexcom G7 with this step-by-step guide, ensuring accurate glucose monitoring for effective diabetes management.

On this page
Introduction
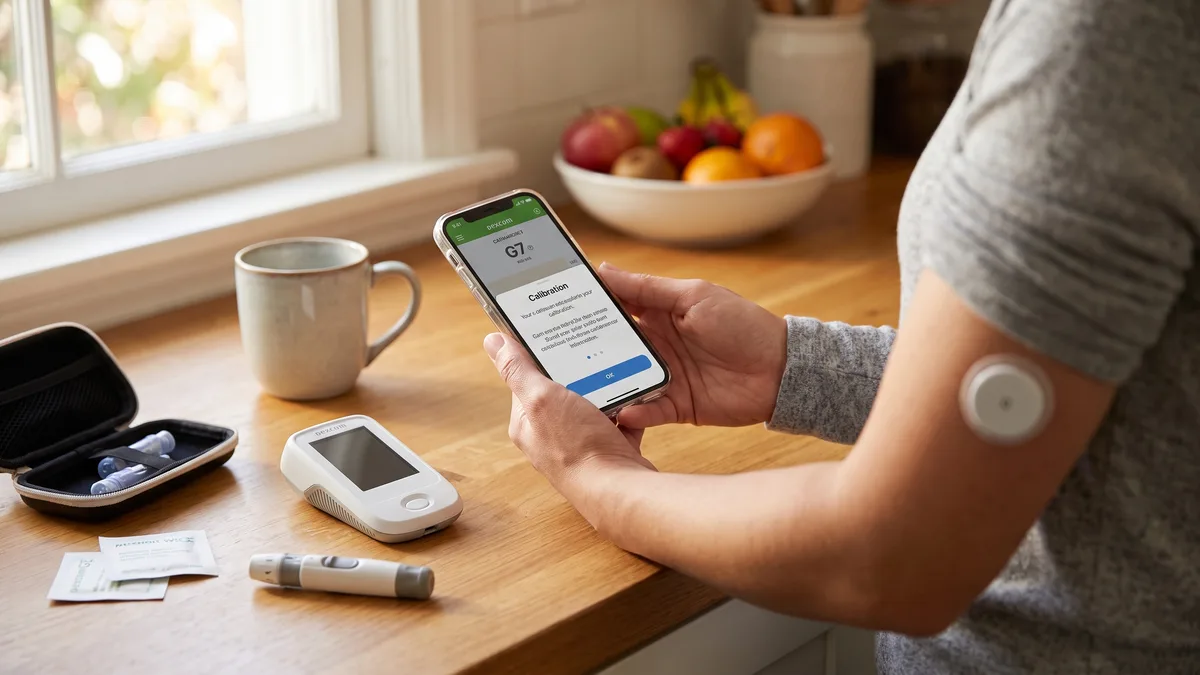
How to calibrate a Dexcom G7: You don't need to. The Dexcom G7 is factory-calibrated and does not require — or accept — manual calibration entries from a blood glucose meter. This guide explains why the G7 works without calibration, what that means for accuracy, and when a confirmatory fingerstick is still recommended.
Continuous glucose monitors have changed how people with diabetes track their glucose day to day. The Dexcom G7 is one of the newer real-time CGM systems, delivering updated glucose information every five minutes and sending alerts when levels trend too high or too low. One question that comes up often for new users — especially those familiar with older CGM models — is whether and how to calibrate a Dexcom G7.
Unlike earlier systems that relied on periodic fingerstick calibrations to maintain accuracy, the Dexcom G7 is factory-calibrated. That means it does not require — and in fact does not accept — manual calibration entries from a blood glucose meter. This design shift simplifies the user experience and reflects advances in sensor chemistry and manufacturing precision. For anyone coming from a G6 or an older Dexcom model, or from a CGM that required daily calibration, this change can feel unfamiliar at first.
This guide explains what calibration means in the context of CGM technology, why the G7 does not need it, and what to do if your readings seem off. It also covers when a confirmatory fingerstick is still recommended — not to adjust the sensor, but to verify a reading before making a treatment decision. Whether you're newly diagnosed and navigating your first CGM, or you're a caregiver coordinating diabetes management for a family member, understanding how the G7 works will help you use it with confidence. For more context on how CGM fits into overall diabetes management strategies, our other guides cover the broader picture of glucose control and A1C targets.
In the sections that follow, we'll walk through what calibration is, how the G7's factory calibration works, and what to do when you want to double-check a reading. The goal is to give you a clear, practical understanding of how to get accurate glucose data from your G7 without second-guessing the device or over-relying on fingersticks.
Understanding Calibration
Calibration is the process of adjusting a continuous glucose monitor (CGM) to improve the accuracy of its readings by comparing sensor values to a known reference — typically a fingerstick blood glucose measurement. However, the Dexcom G7 is designed as a factory-calibrated system, meaning it does not require or support manual calibration by the user. Understanding why this is the case, and what "calibration" means in the context of CGM technology, helps clarify what you can expect from the device and how to trust its readings.
How Does the Dexcom G7 Measure Glucose?
CGM devices, including the Dexcom G7, measure glucose in the interstitial fluid — the fluid that surrounds cells in your tissue — rather than directly measuring blood glucose. The sensor uses an electrochemical probe inserted just beneath the skin to detect glucose molecules in this compartment. Because interstitial glucose levels can lag behind blood glucose by several minutes, especially when glucose is changing rapidly, there can be differences between a fingerstick blood glucose reading and the CGM value at the same moment.
Advances in sensor technology have improved the accuracy and consistency of factory-calibrated CGM systems. The Dexcom G7 is calibrated during manufacturing using rigorous quality-control processes, so it arrives ready to use without requiring fingerstick calibration inputs from you.
Why the Dexcom G7 Does Not Require Calibration
Unlike older CGM models that required users to enter fingerstick glucose values periodically to "recalibrate" the sensor, the Dexcom G7 is a no-calibration system. The device's algorithm is designed to provide accurate glucose readings based solely on the factory calibration and the sensor's performance over its 10-day wear period. Adding manual calibrations can actually introduce error if the fingerstick value is inaccurate or taken at a time when blood and interstitial glucose are not well-aligned.
For more context on how glucose monitoring fits into broader diabetes management, see our guide on what's a normal blood sugar level.
When Accuracy Matters Most
Apparent accuracy of CGM devices tends to be lower in individuals with high glucose variability and at the extremes of the glucose range — very high or very low readings. If you notice a persistent difference between Dexcom G7 readings and fingerstick values, the recommendation is to confirm with a fingerstick before making treatment decisions, rather than attempting to manually "calibrate" the sensor. The Dexcom G7 system is not designed to accept calibration entries, so trusting the factory calibration and following the manufacturer's guidance is the best approach.
Factory-calibrated CGM systems like the Dexcom G7 are engineered to deliver accurate readings without user calibration — adding manual inputs can reduce accuracy rather than improve it.
How to Calibrate a Dexcom G7 (Explained)
The Dexcom G7 is a factory-calibrated continuous glucose monitor, meaning it does not require — or allow — user calibration. Unlike earlier CGM models that needed regular fingerstick blood glucose checks to maintain accuracy, the G7 is designed to deliver reliable readings without any manual calibration input from the user.
What Factory Calibration Means
Factory calibration refers to the process completed by the manufacturer before the sensor reaches you. Each G7 sensor is individually calibrated during production, eliminating the need for you to enter blood glucose values during the 10-day wear period. This design choice simplifies the user experience and reduces the burden of frequent fingerstick testing solely for calibration purposes.
Research on modern CGM systems shows that factory-calibrated devices — including the Dexcom G6 and G7 — have been widely adopted in clinical studies precisely because they remove the calibration step. In a review of continuous glucose monitoring in critical care settings, 11 studies used factory-calibrated CGM devices that required no user calibration, demonstrating the reliability of this approach across diverse patient populations.
When Blood Glucose Checks Are Still Needed
While the G7 does not require calibration, you should still perform fingerstick blood glucose tests in specific situations:
- Treatment decisions during rapid glucose changes: When your glucose is rising or falling quickly, interstitial glucose (measured by the CGM) lags behind blood glucose. Confirm with a meter before treating a high or low reading.
- Symptom verification: If you feel symptoms of hypoglycemia or hyperglycemia that do not match your CGM reading, use a meter to verify.
- Sensor warm-up period: During the first few hours after sensor insertion, readings may be less stable. If a reading seems off, a fingerstick can provide confirmation.
- Regulatory and label guidance: The Dexcom G7 is approved for treatment decisions without confirmatory fingersticks in most situations, but your care team may recommend meter checks based on your individual needs.
For readers managing diabetes with insulin or other medications that carry hypoglycemia risk, understanding what's a normal blood sugar level can help you interpret CGM trends and know when a meter check is warranted.
What to Do If Readings Seem Inaccurate
If your G7 readings consistently do not match how you feel or what your meter shows, the issue is not a lack of calibration — it may be a sensor placement or performance concern. Here's what to check:
Step 1
Compare with a meter reading
Perform a fingerstick blood glucose test using a clean, calibrated meter. Compare the result to the G7 reading at the same moment. A difference of up to 15–20% is considered normal due to the lag between blood and interstitial glucose.
Step 2
Review sensor placement and adhesion
Ensure the sensor is placed on a recommended site (back of the upper arm) and that the adhesive is secure. Movement, pressure, or placement over scar tissue can affect accuracy.
Step 3
Wait through the warm-up period
If the sensor was recently inserted, allow the full 30-minute warm-up to complete and give the sensor a few additional hours to stabilize before making treatment decisions.
Step 4
Contact support if the issue persists
If readings remain inconsistent after 24 hours, or if the app displays repeated error messages, contact Dexcom technical support. They can troubleshoot the issue and may replace a faulty sensor.
Why Dexcom Moved Away from User Calibration
Earlier CGM models required calibration every 12 hours because sensor accuracy drifted over time and varied between manufacturing batches. Advances in sensor chemistry, manufacturing precision, and algorithm design have made factory calibration both feasible and more accurate than user-entered values, which can introduce error if the fingerstick itself is imprecise or mistimed.
The shift to factory calibration reflects broader trends in diabetes technology: reducing user burden while maintaining or improving accuracy. This design choice is especially helpful for caregivers managing a family member's diabetes, as it removes one more daily task and potential source of error.
Common Issues and Troubleshooting
The Dexcom G7 is designed to work without routine calibration, but understanding how the system measures glucose — and what can affect its accuracy — helps you recognize when readings may be off and what to do about it.
Why Do Dexcom G7 Readings Seem Inaccurate?
CGM devices measure glucose in the interstitial fluid, not blood. When glucose levels are changing rapidly — after a meal, during exercise, or when treating a low — there is a natural lag between blood glucose and interstitial glucose. This means the sensor reading may trail behind a fingerstick result by several minutes.
This lag is not a malfunction; it is how the technology works. If you check a fingerstick during a rapid rise or fall and the CGM reading does not match, wait 15 minutes and compare again rather than assuming the sensor is wrong.
Sensor Warm-Up Period
Every new Dexcom G7 sensor requires a 30-minute warm-up after insertion. During this time, the system is stabilizing and no readings are available. If you remove and reapply a sensor, or if the session is interrupted, you will need to wait through another warm-up period.
Do not attempt to calibrate or make treatment decisions during warm-up. The system will notify you when it is ready to display glucose values.
Interference and Environmental Factors
The Dexcom G7 uses an electrochemical sensor that is specific to glucose, minimizing interference from other substances. However, certain medications — particularly those containing high-dose vitamin C or acetaminophen in some older CGM models — have been reported to affect sensor accuracy in other systems. The G7's design reduces this risk, but if readings seem persistently off and you have started a new medication or supplement, consult the Dexcom G7 user guide or contact your care team.
Compression lows — false low readings caused by lying on the sensor during sleep — can occur if pressure restricts interstitial fluid flow around the sensor filament. If you wake to a low alert but feel fine and a fingerstick shows normal glucose, a compression low is the likely cause. Repositioning usually resolves it within minutes.
When to Replace a Sensor Early
Contact Dexcom customer support to report the issue and request a replacement sensor. They will walk through troubleshooting steps and, if the sensor is determined to be faulty, send a replacement at no charge.
Signal Loss and Connectivity Issues
If the Dexcom app or receiver shows "signal loss," the most common causes are:
- The transmitter and receiver are too far apart (keep them within 20 feet with minimal obstructions)
- The phone's Bluetooth is turned off or the app does not have Bluetooth permissions enabled
- The sensor session has expired and needs to be replaced
Restart the app, confirm Bluetooth is on, and move the receiver closer to the sensor. If the issue persists after these steps, restart your phone or receiver.
Persistent High or Low Readings
If the sensor consistently shows high or low readings that do not match how you feel or what fingersticks confirm, first rule out the physiological causes — rapid glucose changes, recent calibration on an older CGM model you may have used previously, or compression. If the pattern continues across multiple fingerstick comparisons over several hours, the sensor may be experiencing a technical issue and should be replaced.
Never ignore symptoms of hypoglycemia or hyperglycemia even if the sensor reading suggests otherwise. Your symptoms and fingerstick results take precedence over the CGM trace when they conflict.
Conclusion
The Dexcom G7 does not require manual calibration — the sensor is factory-calibrated and designed to run without fingerstick entries. This hands-off design makes continuous glucose monitoring more accessible, especially for people who are newly diagnosed or managing diabetes alongside other responsibilities. If you've been searching for how to calibrate a Dexcom G7, the short answer is: you don't need to, and the system is built to deliver reliable glucose data without that step.
That said, accuracy still depends on proper sensor placement, avoiding the first 24 hours of unstable readings, and confirming any treatment decision with a fingerstick when the app prompts you or when symptoms don't match the trace. Real-time CGM systems like the Dexcom G7 update every few minutes and provide alerts for trends, but they measure interstitial glucose — not blood glucose — so a lag of 10–15 minutes is normal, especially during rapid changes.
If you're looking to make the most of your CGM data and understand what those glucose patterns mean for day-to-day management, What's a Normal Blood Sugar Level and Why It Matters walks through target ranges and how to interpret the numbers you're seeing on your trace. For readers working to improve their A1C alongside CGM use, How to Lower Your A1C Fast: Realistic Strategies offers evidence-based approaches. For troubleshooting — sensor errors, compression lows, or persistent inaccuracy — contact Dexcom support directly or bring the issue to your care team; they can review your trace history and determine whether a sensor replacement or a different placement site is warranted.
CGM systems have been shown to improve time-in-range and reduce HbA1c for many users, but the technology works best when paired with a clear understanding of what the data represents and when to act on it. Treat the Dexcom G7 as a navigation tool, not a diagnostic device — it shows you the direction and speed of glucose changes, and your care team translates that into treatment decisions. Keep your app updated, rotate sensor sites, and confirm any critical reading before making a medication or insulin adjustment.
FAQ
Does the Dexcom G7 need to be calibrated?
No. The Dexcom G7 is factory-calibrated and does not require or accept manual calibration entries from a blood glucose meter.
Can I manually calibrate my Dexcom G7 if readings seem off?
No. The G7 app and receiver do not have a calibration function. If readings seem inaccurate, confirm with a fingerstick meter and contact Dexcom support if the issue persists.
When should I check with a meter if I use a Dexcom G7?
Check with a meter during rapid glucose changes, if symptoms don't match your CGM reading, during the first few hours after sensor insertion, or whenever your care team recommends verification before a treatment decision.
Why is my Dexcom G7 reading different from my meter?
The G7 measures interstitial glucose, which can lag 5–10 minutes behind blood glucose during rapid changes. A difference of up to 15–20% is considered normal.
What should I do if my Dexcom G7 consistently reads too high or too low?
Compare with a fingerstick meter at multiple time points. If the difference persists beyond 24 hours or exceeds 20%, contact Dexcom support for troubleshooting and a possible sensor replacement.

Maren Alcott is the lead presenter at DiabetesCompass. She is an AI-presented digital character. Every article Maren presents is researched and fact-checked by the DiabetesCompass editorial team against the ADA Standards of Care, peer-reviewed journals, and named clinical sources. Maren does not give medical advice — for questions about your specific situation, talk to your care team.