
How to Remove a Dexcom G7 Sensor Safely and Painlessly
Learn how to remove a Dexcom G7 sensor safely with step-by-step instructions, skin care tips, and troubleshooting advice for a smooth removal process. Removing a Dexcom G7 sensor is easy with the right techniques.

On this page
Introduction
To remove Dexcom G7 sensor safely, soften the adhesive first with baby oil or adhesive remover, peel slowly in one smooth motion parallel to the skin, and clean the site afterward with mild soap and water.
Removing a Dexcom G7 sensor might seem straightforward, but doing it correctly makes a real difference for your skin health and your next sensor application. The G7's adhesive is designed to stay secure through showers, workouts, and daily life — which means removal requires a bit more care than simply pulling it off.
Many new CGM users worry about pain, skin irritation, or leaving adhesive residue behind. The good news: with the right approach, sensor removal is quick and comfortable. Understanding the proper technique protects your skin, reduces discomfort, and sets you up for success when you apply your next sensor.
The Dexcom G7 sensor includes a 12-hour grace period after your 10-day session ends, giving you flexibility to time your removal when it's convenient — whether that's first thing in the morning, after a shower, or when you have a few quiet minutes to take care of it properly. If you're comparing CGM options or considering an over-the-counter system, our guide to the best CGM for non diabetics covers what to expect from different devices.
This guide walks through the complete removal process step by step, from gathering your supplies to caring for your skin afterward. Whether this is your first sensor or your fiftieth, following these steps ensures a smooth, safe removal every time.
What Is the Dexcom G7 Sensor?
The Dexcom G7 is a continuous glucose monitor (CGM) that tracks your glucose levels in real time throughout the day and night. Unlike fingerstick meters that give you a single snapshot, the G7 sends a new reading to your phone or receiver every five minutes, showing you trends and patterns that help you make informed decisions about food, activity, and medication timing.
How the G7 Sensor Works
The sensor itself is a small, all-in-one device that sits on your skin—typically on the back of your upper arm or your abdomen. A thin filament extends just under the skin to measure glucose in the interstitial fluid (the fluid between your cells). The sensor is designed to stay in place for up to 10 days, held by a medical-grade adhesive that's strong enough to withstand showers, exercise, and daily life.
Each sensor comes with a built-in applicator that inserts the filament and secures the sensor in one quick motion. Once the 10-day wear period ends, or if you need to remove it early due to a sensor error, skin irritation, or other issue, the sensor must be taken off and replaced with a new one. The G7 is not designed to be reused or refilled.
Why Safe Removal Matters
Removing the sensor correctly protects your skin and makes the process more comfortable. The adhesive is designed to hold firmly, so pulling the sensor off too quickly or at the wrong angle can cause unnecessary discomfort, leave residue, or irritate the skin underneath. Some people experience redness, itching, or adhesive residue after removal, especially if they have sensitive skin or have worn the sensor for the full 10 days.
Safe removal also helps you avoid damaging the skin or creating a negative association with sensor changes. If you're new to CGM or helping a child or family member with diabetes, a calm, methodical approach to removal makes the experience less stressful for everyone involved. For caregivers, demonstrating a gentle removal process can help build confidence and reduce anxiety around the next sensor insertion.
If you're exploring CGM options or comparing devices, understanding the removal process is part of the bigger picture of daily device management. For a broader look at over-the-counter CGM choices, see our guide to the best CGM for non diabetics.
A gentle, patient removal process protects your skin and makes the next sensor change easier.
Preparation for Removal
Before you remove your Dexcom G7 sensor, a few simple preparation steps make the process smoother and help protect your skin. Proper preparation reduces discomfort, minimizes the risk of irritation, and ensures you have everything you need within reach.
Inspect the Sensor Site
Start by checking the skin around your sensor. Look for any signs of redness, irritation, or allergic reaction. If you notice significant inflammation or a rash that extends beyond the adhesive footprint, consult your care team before removing the sensor — they may want to evaluate the site or adjust your placement strategy for the next sensor.
Mild redness directly under the adhesive is common and usually resolves quickly after removal, but any persistent or spreading reaction warrants a conversation with your provider.
Gather Your Materials
Having the right supplies on hand before you begin makes the removal process easier and less stressful. You'll need:
- Adhesive remover or baby oil — to soften the adhesive and reduce pulling on the skin
- Clean, dry cloth or gauze — for wiping away residue
- Mild soap and water — for cleaning the site after removal
- A small trash bag or container — for disposing of the used sensor
Clean the Area
Once you've inspected the site and gathered your materials, gently clean the skin around the sensor with mild soap and water. Pat the area dry with a clean towel. This step removes oils, sweat, and debris that could interfere with adhesive removal or cause irritation once the sensor is off.
Cleaning the skin before removal also gives you a chance to check one more time for any reactions or concerns that might need attention.
How Do You Remove Dexcom G7 Sensor Safely?
Removing your Dexcom G7 sensor doesn't have to be uncomfortable. The process is straightforward when you follow the manufacturer's guidance and use a few practical techniques to minimize skin irritation. Most people find that taking a moment to soften the adhesive before you start makes the entire removal smoother and less likely to leave residue or pull on skin.
The key is working with the adhesive rather than fighting it. Dexcom designs the G7 adhesive patch to stay secure for the full 10-day wear period, so a little preparation goes a long way toward a clean, painless removal.
Soften the Adhesive First
Before you attempt to remove Dexcom G7 sensor, give the adhesive time to loosen. Apply baby oil or a medical adhesive remover along the edges of the sensor's tape and wait 5 to 10 minutes. This simple step softens the bond between the adhesive and your skin, reducing the pull and making the patch easier to lift without tugging on hair or irritating the skin underneath.
Alternatively, removing the sensor after a warm shower or using a warm, damp cloth on the patch for a few minutes can achieve the same effect. The warmth and moisture weaken the adhesive's grip naturally.
Peel the Sensor Off in One Smooth Motion
Step 1
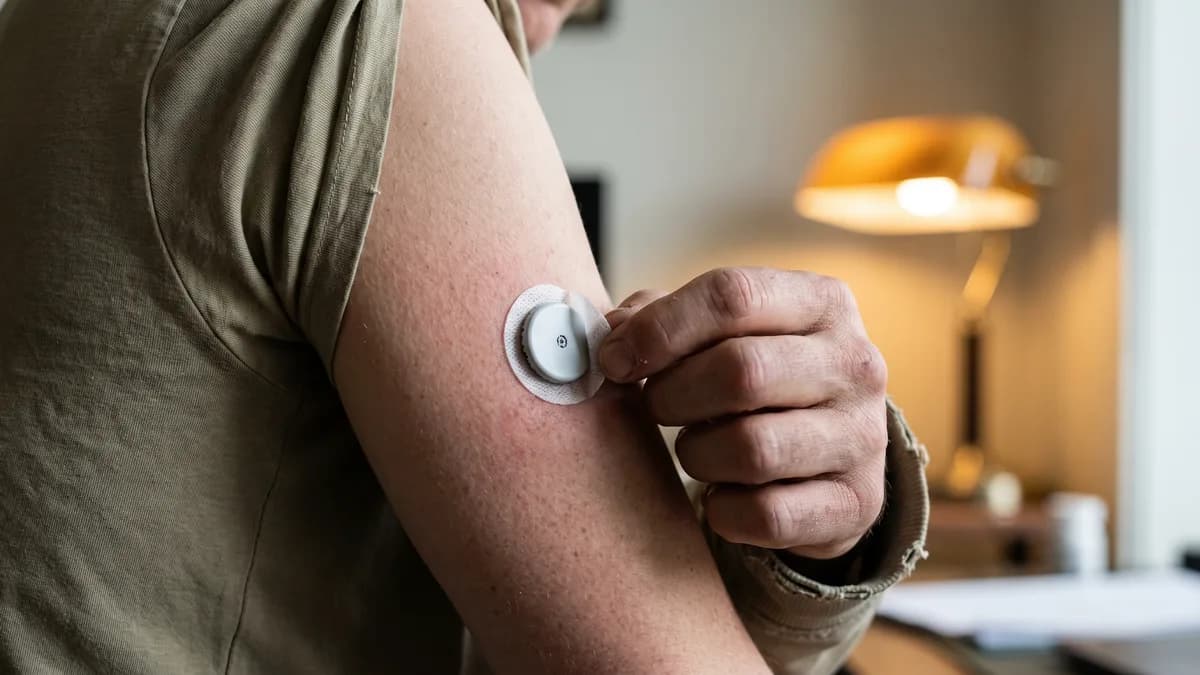
Locate the edge of the adhesive patch
Find a corner or edge of the patch where the adhesive meets your skin. Gently lift that edge with your fingernail or the tip of your finger until you have enough to grip.
Step 2
Peel like a bandage
Once you have a grip on the edge, peel off the adhesive patch in one smooth, steady motion—just like removing a bandage. Pull parallel to the skin rather than straight up to minimize discomfort. Some people find it helpful to fold the patch over itself as they peel, working in the same direction as hair growth if the sensor is placed on a hairy area.
Step 3
Use the stretch-and-push technique if needed
If the patch resists or feels stuck, try stretching the loosened edge slightly and pushing your fingers under the patch to separate it from the skin. This technique distributes the pressure more evenly and can prevent sharp tugs on sensitive skin.
The entire removal should take only a few seconds once the adhesive is softened. If you feel significant resistance, stop and apply more adhesive remover or warmth rather than forcing the patch off.
What to Do If Adhesive Residue Remains
It's common to see a small amount of adhesive residue on your skin after you remove the sensor. Don't scrub or pick at it. Instead, apply a bit more baby oil or adhesive remover to a cotton pad and gently rub the residue in a circular motion until it lifts away. Soap and water alone usually won't dissolve medical-grade adhesive, so an oil-based product is your best option.
If you're switching to a different CGM system or exploring other options, you can learn more about Dexcom Stelo vs Abbott Lingo: Which OTC CGM Is Right for You to compare features and adhesive profiles.
Post-Removal Care
Once you've removed your Dexcom G7 sensor, proper skin care helps prevent irritation and keeps the site ready for your next sensor placement. Most people experience no issues after removal, but understanding what's normal—and what's not—gives you confidence to manage your sensor routine independently.
Immediate Skin Care After Removal
After peeling away the sensor, you'll likely see a small indentation or slight redness where the adhesive sat against your skin. This is normal and typically fades within a few hours. Gently wash the area with mild soap and lukewarm water, pat it dry with a clean towel, and let the skin breathe.
If you notice mild irritation—slight itching or pink skin—a basic moisturizing lotion can provide relief. For more noticeable inflammation, a thin layer of over-the-counter hydrocortisone cream (0.5% or 1%) can calm the skin. Apply sparingly and avoid using it on broken skin or open wounds.
Recognizing Adhesive Residue and Skin Reactions
Adhesive residue is common and harmless. If soap and water don't remove it completely, try an adhesive remover wipe designed for medical devices, or a small amount of baby oil on a cotton pad. Avoid scrubbing aggressively—gentle, repeated passes work better and protect your skin.
Some people develop contact dermatitis from prolonged adhesive exposure, which appears as red, itchy patches that persist beyond a few hours. If you see blistering, swelling, or a rash that spreads beyond the sensor footprint, discontinue sensor use at that site and consult your healthcare provider. You may benefit from a barrier wipe or hypoallergenic adhesive overlay for future placements.
When to Seek Medical Advice
Most post-removal concerns resolve on their own, but a few situations warrant professional guidance. Contact your care team if you notice:
- Persistent redness or swelling lasting more than 24 hours
- Signs of infection, including warmth, pus, or increasing pain at the site
- A broken sensor wire embedded under the skin
If you're considering an over-the-counter CGM or comparing devices, our guide Dexcom Stelo vs Abbott Lingo: Which OTC CGM Is Right for You walks through the differences in adhesive design, wear time, and skin-friendliness across models.
Preparing the Site for Your Next Sensor
Give the removal site at least a day to recover before placing a new sensor there, and longer if you saw any irritation. Clean, dry, hair-free skin ensures the best adhesion and the most comfortable wear. If you've had repeated irritation, consider switching to a different body site—upper arm, abdomen, and back of the upper arm are all approved locations for the Dexcom G7, and each person's skin reacts differently depending on the area.
Keeping a simple rotation schedule—alternating arms or moving around the approved zones—reduces cumulative stress on any single patch of skin and helps you get the full 10-day wear from each sensor without discomfort.
Conclusion
To remove Dexcom G7 sensor safely, follow these core steps: soften the adhesive with baby oil or remover for 5-10 minutes, peel slowly from the edge in one smooth motion parallel to the skin, clean the site with mild soap and water, and apply moisturizer if needed. Rotating sensor sites and allowing skin recovery time between placements prevents irritation and ensures reliable adhesion for future sensors.
Proper removal technique protects your skin and sets you up for a smooth transition to your next sensor. Clean, healthy skin ensures better adhesion for the replacement sensor and reduces the chance of skin reactions over time. If you notice persistent redness, swelling, or signs of infection after removal, contact your healthcare provider promptly.
As you gain experience with sensor changes, you'll develop a rhythm that works for your skin type and routine. Many people find that consistent removal habits—using the same adhesive remover, moisturizing regularly, and rotating sites—make each change easier than the last.
For those exploring continuous glucose monitoring options or comparing devices, understanding the full sensor lifecycle—from application through removal—helps you make informed decisions about which system fits your needs. You can learn more about the best CGM options for non-diabetics and those managing prediabetes or type 2 diabetes to see how different systems compare in terms of wear time, ease of use, and skin compatibility.
With the right approach, sensor removal becomes a quick, painless part of your diabetes management routine—one less thing to worry about as you focus on the bigger picture of your health.
Frequently Asked Questions About Removing Dexcom G7 Sensor
How long can I wear a Dexcom G7 sensor before removal?
The Dexcom G7 sensor is approved for up to 10 days of continuous wear, with a 12-hour grace period after the session expires. Remove the sensor once it stops providing readings or if you experience skin irritation, sensor errors, or discomfort before the 10-day period ends.
Does it hurt to remove Dexcom G7 sensor?
When you remove Dexcom G7 sensor properly, it should not hurt. Softening the adhesive with baby oil or adhesive remover for 5-10 minutes before peeling makes removal comfortable and minimizes skin pulling. Peeling slowly and parallel to the skin further reduces discomfort.
What should I do if adhesive residue remains after I remove Dexcom G7 sensor?
Apply baby oil or medical adhesive remover to a cotton pad and gently rub the residue in circular motions until it lifts away. Avoid scrubbing aggressively. Soap and water alone typically won't dissolve medical-grade adhesive residue.
Can I reuse a Dexcom G7 sensor after removal?
No. The Dexcom G7 sensor is a single-use device designed for one 10-day wear period. Once you remove Dexcom G7 sensor, it cannot be reactivated or reused. Dispose of the used sensor according to local regulations for electronic waste.
When should I contact my healthcare provider after sensor removal?
Contact your care team if you notice persistent redness or swelling lasting more than 24 hours, signs of infection (warmth, pus, increasing pain), a broken sensor wire embedded under the skin, or a spreading rash beyond the adhesive footprint.
Related reading

Maren Alcott is the lead presenter at DiabetesCompass. She is an AI-presented digital character. Every article Maren presents is researched and fact-checked by the DiabetesCompass editorial team against the ADA Standards of Care, peer-reviewed journals, and named clinical sources. Maren does not give medical advice — for questions about your specific situation, talk to your care team.